Many laboratory users need a magnetic field system that does more than generate a field.
They also need to see the sample, shine a laser on it, collect reflected light, image a device, insert an optical window, or combine the magnet with microscopes, cameras, cryostats, probes, and motion stages.
That creates a real design question:
“How can we keep enough optical access without compromising magnetic field performance too much?”
For Helmholtz coil systems and electromagnets, optical access is never just a mechanical detail. It affects coil geometry, pole gap, open space, structural stiffness, field strength, uniformity, cooling, and sometimes the entire system architecture.
This article explains how cameras, lasers, optical windows, and open structures can be integrated into coil systems while keeping the magnetic field performance realistic.
1. Why Optical Access Matters in Magnetic Field Experiments
Many modern magnetic field experiments are not purely electrical or magnetic.
They may involve:
- Optical imaging
- Laser excitation
- Photoluminescence collection
- Magneto-optical Kerr effect measurement
- Microscopy
- Camera monitoring
- Cryostat windows
- Spectroscopy
- Sample alignment
- Probe observation
- Vacuum or low-temperature optical access
For these applications, the coil system must support both magnetic and optical requirements.
A system that generates the correct magnetic field but blocks the camera or laser path is not useful.
A system with perfect optical access but poor field strength or uniformity is also not useful.
The design must balance both.
2. Optical Access Changes the Magnet Design Problem
A simple magnetic field request may sound like this:
“We need 1 T field.”
But an optical-access request sounds more like this:
“We need 1 T field, a 30 mm pole gap, side optical access, enough space for a sample holder, and a clear laser path at the sample position.”
These are very different design problems.
Optical access can affect:
- Pole gap
- Coil diameter
- Coil spacing
- Frame shape
- Sample position
- Field uniformity
- Magnetic field strength
- Mechanical stiffness
- Cooling method
- Cable routing
- Safety shielding
This is why optical access should be defined at the beginning of the project, not after the magnet has already been designed.
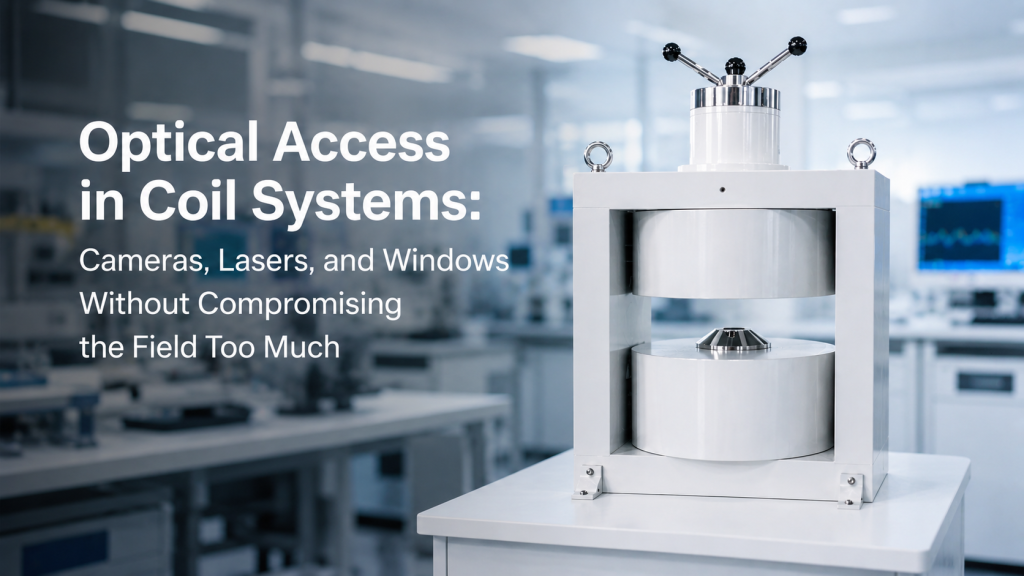
3. Helmholtz Coil Systems: Open by Nature, but Not Unlimited
Helmholtz coil systems are often attractive for optical experiments because they can provide an open central test region.
A Helmholtz coil is commonly used to generate a region of nearly uniform magnetic field near the center. The coil geometry and spacing are important to this uniformity.
Reference link: https://en.wikipedia.org/wiki/Helmholtz_coil
Source:
Why Helmholtz Coils Work Well for Optical Access
Helmholtz coils can provide:
- Open central space
- Side access
- Top access
- Space for fixtures
- Compatibility with cameras
- Compatibility with optical tables
- Possibility for three-axis field control
- Good access for sensor and sample testing
This makes them useful for:
- Geomagnetic simulation
- Sensor calibration
- Optical observation under low or moderate magnetic fields
- Magnetic response imaging
- Low-field material testing
- Experiments requiring sample visibility
Practical Limitation
However, larger openings and larger coil spacing usually reduce field efficiency.
That means the system may need:
- More turns
- Higher current
- Higher voltage
- Larger power supply
- Better cooling
- Larger structure
- Higher cost
Open access is valuable, but it is not free.
4. Electromagnets: Stronger Field, Less Natural Access
Electromagnets are often preferred when users need higher magnetic fields.
But optical access can be more difficult because the sample is usually placed between pole pieces.
Common Optical Access Requirements in Electromagnets
Users may need:
- Side laser access
- Front camera access
- Optical microscope access
- Reflection geometry
- Transmission geometry
- Space for a cryostat window
- Space for sample wiring
- Pole gap large enough for optical components
- Non-magnetic sample holder
Main Trade-Off
For electromagnets, increasing pole gap usually reduces field strength for the same magnet size and power.
A larger gap may be necessary for optical access, but it often requires:
- Larger yoke
- Larger coils
- Higher current
- Higher power supply capacity
- More cooling
- Higher system cost
This is one of the most important hidden trade-offs in optical magnet projects.
5. Cameras: Line of Sight Is Not Enough
For camera-based experiments, users often say:
“We just need visual access.”
That is too vague.
Camera access should be defined by:
- Viewing direction
- Working distance
- Field of view
- Lens size
- Camera mounting position
- Illumination path
- Sample height
- Whether the camera must move
- Whether the camera is inside or outside the field region
- Whether the camera or lens contains magnetic parts
A camera may have a clear line of sight but still be unusable if the working distance is wrong or if the fixture blocks the sample.
Key Question
Do you need simple monitoring, or do you need measurement-quality imaging?
Simple monitoring may only require a small viewing path.
Measurement-quality imaging may require stricter alignment, vibration control, lighting, and stable optical geometry.
6. Lasers: Beam Path, Reflection, and Safety Matter
Laser-based experiments need more than an open hole.
The system must support a defined optical path.
Laser Access Details to Define
Users should specify:
- Incident beam direction
- Reflected or transmitted beam path
- Beam height
- Beam diameter
- Working distance
- Required angle of incidence
- Polarization sensitivity
- Space for mirrors or lenses
- Whether the beam passes through windows
- Whether the sample rotates or stays fixed
- Laser safety requirements
For magneto-optical experiments, polarization may matter.
The magneto-optical Kerr effect involves changes in reflected light from a magnetized surface and is widely used to study magnetization behavior. NIST describes MOKE as a reflected-light polarization effect used to study magnetic materials and magnetic domain behavior.
Reference link: https://www.nist.gov/publications/large-magneto-optical-kerr-effect-and-real-time-imaging-magnetic-domain-antiferromagnet
Source:
This means optical path stability and polarization compatibility can directly affect data quality.
7. Windows: Optical Access Through Cryostats or Chambers
Many magnetic field experiments use windows because the sample is inside a cryostat, vacuum chamber, or controlled environment.
Windows introduce additional design questions.
Window Parameters to Consider
A buyer should define:
- Window material
- Wavelength range
- Transmission requirement
- Window thickness
- Clear aperture
- Angle of incidence
- Reflection losses
- Polarization effects
- Thermal environment
- Vacuum compatibility
- Mechanical mounting
- Whether multiple beams pass through the same window
For optical cryogenic experiments, the coil or electromagnet must be designed around the window geometry and sample position.
The magnet supplier does not need to design the entire optical system, but the magnetic field system must leave enough space and access for it.
8. Transmission vs. Reflection Geometry
Optical experiments often fall into two basic layouts.
Transmission Geometry
In transmission geometry, light passes through the sample or sample region.
This may require:
- Two opposite optical windows
- Clear beam path through the magnet center
- Minimal obstruction
- Good alignment between entrance and exit paths
- Space for detectors or collection optics
Transmission geometry can be challenging if the magnet structure blocks the beam path.
Reflection Geometry
In reflection geometry, light reflects from the sample surface.
This may require:
- One side optical access
- Angled incidence
- space for collection optics
- surface alignment
- stable sample position
- polarization control
Reflection geometry may be easier mechanically, but the required angle and working distance must be defined clearly.
9. Field Direction vs. Optical Direction
The relationship between magnetic field direction and optical path is critical.
Users should define whether the magnetic field must be:
- Parallel to the laser beam
- Perpendicular to the laser beam
- Parallel to the sample surface
- Perpendicular to the sample surface
- Along the optical axis
- Along the sample current direction
- Rotatable relative to the optical path
Different field directions may require different magnet architectures.
Example
For some magneto-optical experiments, the geometry may require the field to be normal to the sample surface.
For other experiments, the field may need to be in-plane.
These two cases may lead to different pole configurations, coil orientations, sample holders, and access paths.
This is why “optical access required” is not enough.
The field direction and optical geometry must be described together.
10. Openings Can Reduce Mechanical Stiffness
Adding optical access often means removing or relocating structural material.
This can reduce frame stiffness.
A weaker structure may create:
- Vibration
- coil misalignment
- pole displacement
- reduced repeatability
- mechanical drift
- sample positioning error
For optical experiments, vibration can be especially problematic because it affects imaging, focusing, and beam stability.
The frame must therefore balance:
- Magnetic performance
- Optical access
- Mechanical rigidity
- Alignment stability
- Ease of sample loading
A beautiful open design is not useful if it cannot hold alignment.
11. Large Openings Can Reduce Field Performance
Optical access often requires larger open spaces.
But larger openings can reduce field performance.
Possible Effects
A larger opening may cause:
- Lower field efficiency
- Larger coil size
- higher current demand
- higher power consumption
- more heat
- more expensive driver
- lower field uniformity
- larger system footprint
This does not mean optical access should be avoided.
It means access should be defined precisely.
“Maximum possible opening” is not a good specification.
“Required 25 mm clear beam path from left to right at 120 mm height” is much better.
12. Optical Components May Contain Magnetic Materials
Even if the coil system is carefully designed, nearby optical hardware may introduce magnetic problems.
Possible sources include:
- Steel screws
- magnetic lens mounts
- camera housings
- motorized stages
- magnetic clamps
- steel optical posts
- translation stages
- magnetic adapters
- small springs
- motors inside focusing systems
For low-field and calibration work, these parts can affect the measurement.
For higher-field work, they may also experience unwanted force or torque.
Users should check whether optical accessories near the field region are non-magnetic or placed far enough away.
13. Cable Routing for Cameras, Lasers, and Sensors
Optical systems often add cables.
These may include:
- Camera cables
- power cables
- laser control cables
- photodetector cables
- stage motor cables
- temperature sensor wires
- sample electrical leads
Poor cable routing can create:
- obstruction of the optical path
- magnetic interference
- cable movement
- vibration
- signal noise
- safety hazards
- repeatability problems
Cable routing should be planned as part of the magnet layout.
It should not be solved after installation with improvised cable ties.
14. Cooling and Optical Access Can Conflict
Cooling systems can also interfere with optical access.
For electromagnets and high-current coils, cooling may require:
- water hoses
- fans
- heat sinks
- chiller connections
- flow sensors
- temperature probes
These components can block optical paths or create vibration and noise.
Design Questions
Before finalizing the system, buyers should ask:
- Will fans disturb optical stability?
- Will water hoses block the camera?
- Can cooling lines be routed away from the beam path?
- Will the chiller create vibration?
- Is water cooling required for continuous operation?
- Is forced air cooling acceptable near sensitive optics?
The cooling strategy should be selected together with the optical layout.
15. What Buyers Should Prepare Before Requesting a Quote
For optical-access coil systems, a strong RFQ should include both magnetic and optical details.
Magnetic Requirements
- Magnet type: Helmholtz coil or electromagnet
- Required field strength
- Field direction
- DC, AC, sweep, or pulsed operation
- Required uniformity
- Uniform region size
- Duty cycle
- Cooling preference
Optical Requirements
- Camera, laser, microscope, or window access
- Optical path direction
- Beam height
- Beam diameter
- Working distance
- Incident and collection angles
- Transmission or reflection geometry
- Wavelength range
- Polarization sensitivity
- Window size and material, if applicable
- Space for lenses, mirrors, or detectors
Mechanical Requirements
- Sample size
- fixture size
- cryostat or chamber dimensions
- required opening direction
- cable routing
- table or platform dimensions
- maximum system footprint
- non-magnetic material requirements
- vibration sensitivity
The supplier cannot optimize the magnet and optical access if the optical path is not defined.
16. Practical Design Examples
Example 1: Camera Monitoring in a Helmholtz Coil
The user only needs to observe sample position during magnetic exposure.
A relatively simple open-frame Helmholtz coil may be enough.
Key concerns:
- clear visual line of sight
- camera working distance
- fixture does not block the view
- cables do not enter the field center
- magnetic field uniformity remains acceptable
Example 2: Laser Reflection in an Electromagnet
The user needs a laser beam to hit the sample between the poles and collect reflected light.
Key concerns:
- pole gap
- sample height
- incidence angle
- reflected beam path
- optical table compatibility
- field direction relative to sample surface
- pole shape and access opening
- vibration and thermal stability
Example 3: Cryostat with Optical Windows Inside a Coil
The user has a cryostat with windows and needs a magnetic field at the sample.
Key concerns:
- cryostat outer diameter
- sample position inside cryostat
- window height
- beam path through windows
- coil opening
- field uniformity at sample position
- cable and vacuum line routing
- thermal and mechanical clearance
Example 4: Magneto-Optical Measurement with Polarization Sensitivity
The user needs stable polarization-based optical measurement under magnetic field.
Key concerns:
- optical path stability
- field direction
- sample orientation
- vibration
- magnetic noise
- window birefringence, if relevant
- non-magnetic optical mounts
- repeatable sample positioning
17. Why Early Layout Sketches Help
For optical-access magnet systems, a simple sketch can prevent many mistakes.
A useful sketch may show:
- magnet or coil center
- sample position
- optical beam path
- camera direction
- window location
- fixture position
- cable direction
- required opening
- field direction
- available lab space
The sketch does not need to be perfect.
It only needs to show the spatial relationship between the field, sample, and optical system.
For custom magnet projects, a rough layout is often more useful than a long written description with missing geometry.
18. How Cryomagtech Supports Optical-Access Coil and Magnet Systems
Cryomagtech supplies custom Helmholtz coil systems, electromagnets, three-axis magnetic field systems, magnetic field drivers, and related structures for laboratory magnetic field experiments.
For optical-access projects, we help evaluate:
- Field range
- field direction
- uniformity region
- open test space
- pole gap or coil opening
- camera or laser access
- reflection or transmission geometry
- cryostat or chamber clearance
- fixture design
- non-magnetic material selection
- cooling and cable routing
- driver matching and duty cycle
👉 Product link placeholder: Cryomagtech Optical-Access Helmholtz Coil and Electromagnet Systems
The goal is not to maximize optical access at any cost.
The goal is to provide enough access for the real optical experiment while protecting the magnetic field performance that the measurement depends on.
References
- Wikipedia – Helmholtz Coil
https://en.wikipedia.org/wiki/Helmholtz_coil - NIST – Large Magneto-Optical Kerr Effect and Real-Time Imaging of Magnetic Domains
https://www.nist.gov/publications/large-magneto-optical-kerr-effect-and-real-time-imaging-magnetic-domain-antiferromagnet - Wikipedia – Magneto-Optic Kerr Effect
https://en.wikipedia.org/wiki/Magneto-optic_Kerr_effect
Key Takeaways
- Optical access in coil systems must be planned together with magnetic field requirements.
- Cameras, lasers, windows, cryostats, and optical paths can change coil geometry, pole gap, structure, and field performance.
- Helmholtz coils often provide better open access, but larger openings may reduce field efficiency.
- Electromagnets can provide stronger fields, but optical access usually depends heavily on pole gap and geometry.
- Field direction and optical direction must be defined together.
- Optical mounts, screws, stages, and cables near the sample can affect magnetic experiments.
- Early layout sketches help suppliers design a realistic system with fewer assumptions.
For optical-access magnetic field systems, the real question is not only:
“Can we see the sample?”
The better question is:
“Can we see, illuminate, or collect from the sample while still maintaining the magnetic field strength, uniformity, stability, and geometry required by the experiment?”